
Chronotron supports playlists since Release 43. The playlist functionality is accessible through the Playlist pane, which you can open by selecting Playlist out of the hamburger menu.

In this post I’ll go through the ins and outs of playlists in Chronotron.
Creating Playlists
There are multiple ways to create playlists in Chronotron. You can either:
- Select multiple files during Open (Ctrl + O). By the way, the complete list of keyboard shortcuts can be found here.
- While the Playlist pane is visible, click Add (Ctrl + Shift + O) to select the files to be added to the current playlist.
- Drop media files from Windows Explorer into the Playlist pane.
- If you made Chronotron your default app for media files in Windows, then opening multiple files directly from Windows Explorer will launch the app and create a new playlist with those files.
- From the Recent or Library dropdowns, clicking the “+” button – depicted below – will add the media to the current playlist. If, by accident, you missed to hit the “+” button, the Revert button will come in handy.

You can save the playlist for later use once you’re happy with it. Just click Save (Ctrl + S) and select the location where you want the new playlist to be stored. If you saved the Playlist at any location under your Music or Video libraries, then the app will also show your playlist under Playlists in the Library dropdown.
Playlist AutoSave is enabled by default, so you don’t have to care about saving the current playlist every time you modify it. You can disable AutoSave via the Options pane.
The New and Save As commands – shown below – allow you to start building a new playlist from scratch or saving the current playlist to a different .m3u file, respectively.

Playlists Created with Other Programs
Chronotron supports opening .m3u files created by Winamp, Windows Media Player or other programs.
Unlike most other programs, though, Chronotron stores the media parameters used for each file in the playlist, that is, tempo, key, speed, equalizer settings, volume, balance, channel selection, video flip and video delay. This allows you, for instance, to add the same song multiple times to the same playlist, each time at a different tempo or key.
A .m3u file is just a text file listing the locations of the files to be played in sequence. The screenshot below is an example of what a .m3u file looks like when opened in notepad.exe.

While that’s a simple – yet powerful – approach, it turns out that with great power comes great responsibility: a maliciously crafted playlist could induce the player to load harmful content by exploiting bugs, either in the app or in the OS, to compromise your system security.
To mitigate such threats, Microsoft Store apps are granted limited access to files stored in your PC. Apps are only allowed to load files resulting from an explicit user action, like the Open File dialog box or drag & drop into the app window, or files stored in certain locations, like the Audio and Video libraries (i.e. My Music and My Videos).
In the above example, you can see that the media files are stored under D:\Playlist Media. Because that location is currently not part of my Windows libraries, when I first tried to open this playlist with Chronotron, I got the following error message:
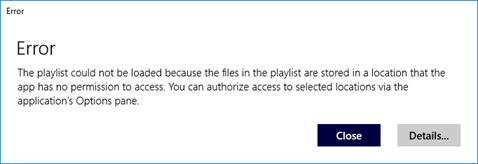
If the media files were stored under My Music, Chronotron would have played them just fine. However, the app is now complaining about the fact that it cannot access the location where these files are stored.
So, all I need to do is go to the Options pane and authorize Chronotron to access D:\Playlist Media – or even the whole D:\ drive, if I feel like I trust the app – and voilà: the playlist plays. The screenshot below shows the relevant section of the Options pane.
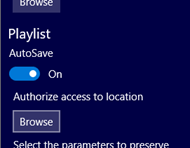
Alternatively, I could have made D:\Playlist Media part of My Music library, in which case the app would have been automatically authorized to access the files.
Other Common Playlists Tasks
You can reorder playlist items by dragging them around, either using touch or the mouse. Please note that, when using touch input, you need to tap and hold on the item to start dragging it.
Another way to move playlist items is by using the Up and Down buttons in the bottom toolbar. This toolbar also allows you to remove selected items and select all items in one go.

If your device sports a touchscreen, you can remove items without selecting them by swiping the item you want to remove to the left.
Conversely, if you hover the mouse over playlist items, you can enter selection mode by clicking the checkbox next to the item.
Wrap Up
I hope this post provides a good understanding of how playlists work in Chronotron. Don’t hesitate to post your comments here or contact me via the usual support channels if you have questions, comments or suggestions.
